
- Throne of Thunder
- Manaforge Omega
- MSV / HoF / ToES
- Liberation of Undermine
- Dragon Soul
- TotFW / BWD / BoT
- Aberrus
- Icecrown Citadel
- Ruby Sanctum
- Trial of the Crusader
- Imperator Averzian
- Vorasius
- Vaelgor & Ezzorak
- Fallen-King Salhadaar
- Lightblinded Vanguard
- Crown of the Cosmos
- Chimaerus the Undreamt God
- Belo'ren, Child of Al'ar
- Midnight Falls
- Immerseus
- Fallen Protectors
- Norushen
- Sha of Pride
- Galakras
- Iron Juggernaut
- Kor'kron Dark Shaman
- General Nazgrim
- Malkorok
- Spoils of Pandaria
- Thok the Bloodthirsty
- Siegecrafter Blackfuse
- Paragons of the Klaxxi
- Garrosh Hellscream
- Jin'rokh the Breaker
- Horridon
- Council of Elders
- Tortos
- Megaera
- Ji-Kun
- Durumu the Forgotten
- Primordius
- Dark Animus
- Iron Qon
- Twin Empyreans
- Lei Shen
- Ra-den
- Plexus Sentinel
- Loom'ithar
- Soulbinder Naazindhri
- Forgeweaver Araz
- The Soul Hunters
- Fractillus
- Nexus-King Salhadaar
- Dimensius, the All-Devouring
- The Stone Guard
- Feng the Accursed
- Gara'jal the Spiritbinder
- The Spirit Kings
- Elegon
- Will of the Emperor
- Imperial Vizier Zor'lok
- Blade Lord Ta'yak
- Garalon
- Wind Lord Mel'jarak
- Amber-Shaper Un'sok
- Grand Empress Shek'zeer
- Protectors of the Endless
- Tsulong
- Lei Shi
- Sha of Fear
- Vexie and the Geargrinders
- Cauldron of Carnage
- Rik Reverb
- Stix Bunkjunker
- Sprocketmonger Lockenstock
- One-Armed Bandit
- Mug'Zee, Heads of Security
- Chrome King Gallywix
- Morchok
- Warlord Zon'ozz
- Yor'sahj the Unsleeping
- Hagara the Stormbinder
- Ultraxion
- Majordomo Staghelm
- Spine of Deathwing
- Madness of Deathwing
- Ulgrax the Devourer
- Bloodbound Horror
- Sikran, Captain of the Sureki
- Rashanan
- Broodtwister Ovinax
- Nexus Princess Kyveza
- Silken Court
- Queen Ansurek
- Conclave of Wind
- Al'akir
- Omnotron Defense System
- Magmaw
- Atramedes
- Chimaeron
- Maloriak
- Nefarian
- Halfus Wyrmbreaker
- Valiona & Theralion
- Ascendant Council
- Cho#gall
- Sinestra
- Kazzara
- The Amalgamation Chamber
- The Forgotten Experiments
- Assault of the Zaqali
- Rashok, the Elder
- Zskarn
- Magmorax
- Echo of Neltharion
- Scalecommander Sarkareth
- Lord Marrowgar
- Lady Deathwhisper
- Gunship Battle
- Deathbringer Saurfang
- Festergut
- Rotface
- Professor Putricide
- Blood Prince Council
- Blood-Queen Lana'thel
- Valithria Dreamwalker
- Sindragosa
- The Lich King
- Halion
- Northrend Beasts
- Lord Jaraxxus
- Faction Champions
- Twin Val'kyr
- Anub'Arak
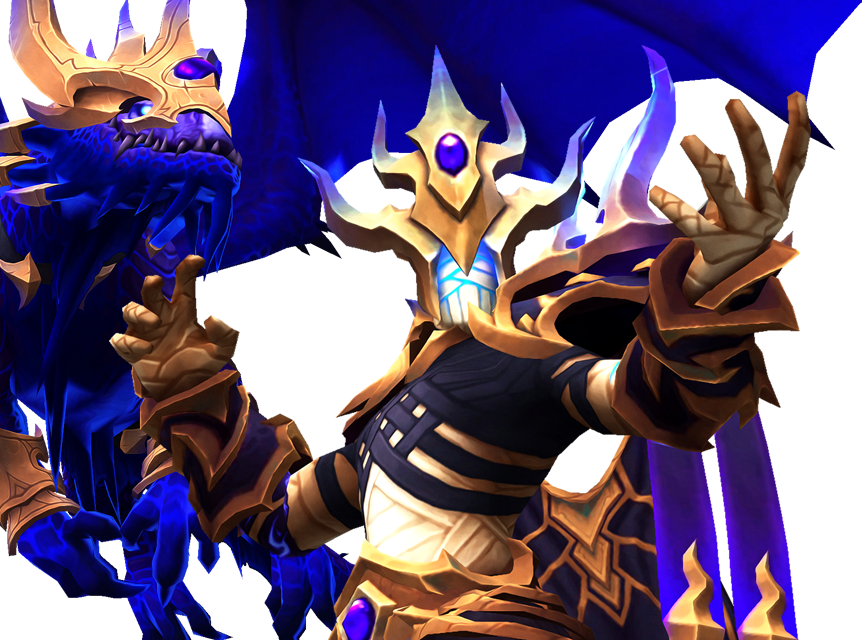
Manaforge Oméga
Roi-nexus Salhadaar
Guide - Stratégie
Combat avec 5 phases différentes qui se déroule ainsi : P1 - P2 - Transition 1 - P2 - Transition 2 - P3.
En P1, le boss applique 3 charges de Lien au raid. Perdez-les avant la fin de la phase ou le boss vous asservit.
La P2 est très courte. Tapez le boss et son dragon et évitez les rayons.
En transition 1, divisez le raid en 2. Chaque groupe prend un portail vers une plateforme et y tue les adds.
Quand le raid revient des plateformes, vous rejouez une P2.
En transition 2, défoncez le dragon du boss. Le boss absorbe la vie restante du dragon pour la P3.
En P3, 6 joueurs invoquent une étoile. Répartissez-les sur les bords de la plateforme et évitez leurs anneaux de piques.
Touchez les étoiles avec les missiles du boss. Les autres joueurs les esquivent.
Salut, je suis Dégno-KirinTor (EU) le traducteur français de Mythic Trap depuis des années. J'ai arrêté d'aider après Manaforge Omega. Je ne sais pas s'ils vont retrouver un traducteur ou une traductrice.
En P1 vous combattez le boss seul. Il applique 3 charges de Lien au raid dont il faut vous débarrasser.
Le combo sur les tanks a 2 sorts différents. Absorbez l'un des 2 pour perdre vos charges de Lien.
Après le 3ème combo, les joueurs qui ont encore des charges sont asservis et la P2 commence.
Si le boss tombe à 50% PV, la P2 commence automatiquement et personne n'est asservi.
TOUT LE MONDE
Le boss inflige de lourds dégâts au raid au début
du combat et vous applique 3 charges de Lien.

Au début du combat, le boss canalise pendant 6 s. Cela fait très mal, vous repousse, et applique 3 charges de Lien au raid.
Perdez ces charges en absorbant une des techniques du combo du boss sur les tanks.
TANKS
Les tanks ne peuvent pas absorber le même
sort 2 fois. Reprenez le boss entre chaque sort.

3 fois en P1, le boss lance une combinaison de 4 attaques sur les tanks.
Ce combo comprend 2 sorts différents : Conquérir (A) et Vaincre (B).
Ce combo a 4 enchaînements possibles différents :
-ABBA
-AABB
-BAAB
-BBAA
Les tanks ne peuvent pas absorber 2 fois la même technique pendant un combo.
Les tanks doivent vite réagir et reprendre le boss.
TOUT LE MONDE
Le raid absorbe le cercle avec le tank pour
partager les dégâts et retirer les charges de Lien.

TECHNIQUE A DU COMBO :
Cercle sur le tank qui lui inflige d'énormes dégâts physiques. Inflige aussi d'énormes dégâts magiques partagés entre les joueurs touchés.
Les joueurs touchés perdent 1 charge de Lien et prennent 50% de dégâts supplémentaires de Conquérir pendant 20 s.
En Normal, tout le monde (sauf les tanks) peut facilement absorber les 2 Conquérir de chaque combo.
TANKS
Orientez le cône en dehors du raid.
Évitez le cône.

TECHNIQUE B DU COMBO :
Large cône en direction du tank qui inflige d'énormes dégâts physiques et magiques à tous les joueurs touchés.
Les joueurs touchés prennent 50% de dégâts en plus de Vaincre pendant 20 s.
Orientez vite le cône hors du raid.
TOUT LE MONDE
Esquivez les rayons laser.

Quelques rayons laser traversent la plateforme qui font très mal aux joueurs touchés.
Vous devez les esquiver pendant que vous jouez le combo tank.
TOUT LE MONDE
Les joueurs ciblés s'écartent derrière le raid.
Les joueurs touchés sont repoussés dans le
sens de la ligne. Ne touchez pas les dragons.

Après chaque combo, 2 vagues successives de joueurs sont ciblés par des lignes en formes de griffe.
Tous les joueurs touchés subissent de lourds dégâts et sont poussés dans le sens de la ligne.
Cela laisse des traces de griffes au sol qui font très mal. Déplacez le boss dans une nouvelle section de la plateforme après les 2 vagues.
Ne vous faites pas pousser dans les dragons sur les rebords de la plateforme !

Des images du dragon du boss sont alignés tout le tour de la plateforme.
Ils balaient avec leurs griffes les joueurs qui s'approchent trop près.
Il est facile de se faire pousser par une ligne dans les dragons et mourir.

Après le 3ème combo, le boss lance Invocation du serment et la P2 commence.
Si vous avez encore des charges de Lien, vous êtes asservis par le boss.

Le boss applique régulièrement un DoT de 8 s sur quelques joueurs.
En expirant, ils explosent et infligent des dégâts au raid.

Le boss inflige des dégâts constants au raid tout au long du combat.
Des images du dragon du boss sont alignés tout le tour de la plateforme.
Ils balaient avec leurs griffes les joueurs qui s'approchent trop près.
Il est facile de se faire pousser par une ligne dans les dragons et mourir.
Le boss applique régulièrement un DoT de 8 s sur quelques joueurs.
En expirant, ils explosent et infligent des dégâts au raid.
Après le 3ème combo, le boss lance Invocation du serment et la P2 commence.
Si vous avez encore des charges de Lien, vous êtes asservis par le boss.
Le boss inflige des dégâts constants au raid tout au long du combat.
La P2 se répète 2 fois : Une fois après la P1, et une fois après la 1ère transition. C'est une phase courte.
En P2 le boss monte sur son dragon et vous combattez les 2.
Invoquez les portails sur le même côté de la plateforme et évitez les rayons.
TOUT LE MONDE
Sortez du cercle au centre de la plateforme
et ne vous faites pas pousser dans le vide.

Au début de la première P2, le boss invoque son dragon qui rejoint le combat.
Il émerge du centre de la plateforme. Ne restez pas dedans.
Le raid est aussi légèrement repoussé.
TOUT LE MONDE
Joueurs ciblés explosent les uns à côté des autres
sur un bord de la plateforme. Des portails y apparaissent.

Le boss cible quelques joueurs avec un cercle puis leur lance son arme, infligeant des dégâts à tous les joueurs touchés.
Un portail apparaît là où les joueurs ciblés ont été touché. Placez-les côte à côte sur un même bord de la plateforme.
TOUT LE MONDE
Le tank utilise un CD pour mitiger les dégâts du rayon.
Le raid esquive les rayons tirés par les portails.

Le dragon crache un énorme rayon sur le tank qui inflige d'énormes dégâts magiques.
Les portails invoqués par Brise-Néant tirent le même rayon et tournent un peu.
Jouez à l'opposé des portails pour éviter plus facilement.
TOUT LE MONDE
Écartez-vous derrière le raid sur les bords de la
plateforme. Ne vous faites pas pousser dans le vide.
Comme en P1 :
Des joueurs sont ciblés par des lignes en formes de griffe.
Tous les joueurs touchés subissent de lourds dégâts et sont poussés dans le sens de la ligne.
Cela laisse des traces de griffes au sol qui font très mal.
La P2 dure 35 s. Après la première P2, la Transition 1 commence.
2 portails s'activent de chaque côté de la plateforme du boss. Divisez le raid en 2.
Chaque groupe prend un portail vers une nouvelle plateforme avec des adds. Ce sont les mêmes adds de chaque côté.
Tuez vite les adds, idéalement simultanément, puis revenez pour la seconde P2.
TOUT LE MONDE
Divisez le raid 2. Chaque groupe prend son portail.
Utilisez le bouton d'action spéciale pour aller sur la plateforme.

Le boss s'envole sur son dragon et ils deviennent invulnérables.
2 portails s'activent de chaque côté de la plateforme. Divisez le raid en 2. Chaque groupe prend un portail vers une plateforme pour y tuer les adds.
Les 2 plateformes ont exactement les mêmes adds.
Utilisez votre bouton d'action spéciale près du portail pour l'utiliser.
Si vous restez sur la plateforme du boss, vous subissez de lourds dégâts.
TOUT LE MONDE
Tuez le titan en priorité avant qu'il
n'explose. Évitez les projectiles.

Sur chaque plateforme il y a 1 Titan manaforgé.
Tuez-le en priorité. S'il atteint 100 d'énergie il explose et vous tue.
Il tire aussi des projectiles à éviter.
TOUT LE MONDE
Esquivez les rayons rotatifs et
interrompez les Princes-nexus.

Sur chaque plateforme il y a 1 Prince-nexus. Ils font la même chose.
Ils canalisent des rayons rotatifs autour d'eux à esquiver.
Vous devez aussi les interrompre.

Sur chaque plateforme, il y a un groupe de Faucheurs.
Ils se téléportent sur des joueurs et leur infligent des dégâts et un DoT de 8 s.
Regoupez-les, contrôlez-les, et tuez-les.

Le boss et sont dragons sont invulnérables tant qu'une plateforme n'a pas été nettoyée.
Dès qu'une plateforme a été nettoyée, le boss redevient actif et la P2 recommence. Essayez de nettoyer les 2 plateformes à peu près simultanément.
Sur chaque plateforme, il y a un groupe de Faucheurs.
Ils se téléportent sur des joueurs et leur infligent des dégâts et un DoT de 8 s.
Regoupez-les, contrôlez-les, et tuez-les.
Le boss et sont dragons sont invulnérables tant qu'une plateforme n'a pas été nettoyée.
Dès qu'une plateforme a été nettoyée, le boss redevient actif et la P2 recommence. Essayez de nettoyer les 2 plateformes à peu près simultanément.
Après être revenu des plateformes de la transition 1 et avoir rejoué une seconde P2, la transition 2 commence.
Le boss est invulnérable et commence une canalisation de 30 s sur son dragon.
Quand il termine, le boss tue son dragon et se soigne pour le montant des PVs restants du dragon.
Défoncez le dragon pour que le boss se soigne le moins possible en P3.
TOUT LE MONDE
Tapez le dragon pour que le boss
se soigne le moins possible.

Le boss est invulnérable et ne fait rien d'autre que canaliser pendant 30 s sur son dragon, infligeant de lourds dégâts au raid.
Quand la canalisation se termine, le dragon meurt et le boss se soigne du montant de PV qu'ils restait au dragon.
Défoncez le dragon, il prend 100% de dégâts en plus !
Après la canlisation, la P3 commence.
TOUT LE MONDE
Esquivez les rayons et tapez le dragon.
Le dragon est immobile au centre de la plateforme et ne fait que tirer des rayons vers les joueurs.
Évitez-les et défoncez le dragon.
Après avoir tué son dragon, la P3 commence et vous affrontez le boss seul.
Déposez les cercles bien répartis sur les bords de la plateforme. Ils deviennent des étoiles.
Envoyez les missiles du boss et de ses images sur les étoiles pour les détruire.
TOUT LE MONDE
4 joueurs ciblés se répartissent sur les bords de la
plateforme. Les failles attirent le raid pendant 5 s.
Raid reste au centre pour réduire dégâts et résister à l'attraction.

Le boss et 3 images ciblent chacun 1 joueur. Le boss cible toujours le tank.
Après 10 s, ils sautent sur leur cible et infligent d'énorrmes dégâts au raid, mais réduits par la distance.
Une faille apparaît où chaque joueur ciblé a été touché et attire le raid pendant 5 s.
Si les failles sont réparties dans la salle, leurs aspirations se contrent. Si elles sont toutes du même côté, bon courage.
Si vous touchez une faille, vous mourez.
TOUT LE MONDE
Évitez les anneaux de piques. C'est très difficile,
concentrez-vous uniquement là-dessus.

Après avoir attiré le raid pendant 5 s, les failles se transforment en étoiles : Un orbe violet géant. Si vous les touchez vous mourez.
Chaque étoile envoie un anneau de piques sur la plateforme. L'anneau s'éloigne petit à petit de son étoile.
Vous devez esquiver 4 anneaux venant de 4 directions différentes, c'est très difficile.
Au bout d'un moment, les anneaux s'écartent tellement de leur étoile qu'ils sortent de la plateforme et vous n'avez plus à les esquiver.
TOUT LE MONDE
Envoyez les missiles dans les étoiles pour
les détruire et empêcher de gros dégâts sur le raid.
Les autres joueurs esquivent les missiles.

Le boss et 2 image ciblent chacun 1 joueur. Le boss cible toujours le tank.
Après 6 s, ils tirent chacun un missile sur leur cible qui infligent d'énormes dégâts sur leur trajectoire.
Envoyez les missiles dans les étoiles pour les détruire. Chaque missile qui rate une étoile inflige de lourds dégâts au raid.
Le boss lance cette technique 2 fois après chaque Choc galactique.

Choc Galactique et Frappe de fléau stellaire infligent d'énormes dégâts physiques supplémentaires au tank et une vulnérabilité de 40 s aux 2 sorts.
La rotation du boss est : 1 Choc Galactique puis 2 Frappes de fléau, avant de recommencer. Échangez-vous le boss entre chaque technique.
Les 2 tanks vont jouer les 2 techniques.

Au lieu de lancer Choc galactique une 4ème fois, le boss remplit rapidement la plateforme d'anneaux de piques.
Les anneaux commencent sur les bords de la plateforme et convergent rapidement vers le centre, couvrant toute la plateforme et tuant le raid.

Choc Galactique et Frappe de fléau stellaire infligent aussi un puissant DoT de 8 s aux joueurs ciblés.
Utilisez un CD défensif quand vous êtes ciblés par ces techniques.
Choc Galactique et Frappe de fléau stellaire infligent d'énormes dégâts physiques supplémentaires au tank et une vulnérabilité de 40 s aux 2 sorts.
La rotation du boss est : 1 Choc Galactique puis 2 Frappes de fléau, avant de recommencer. Échangez-vous le boss entre chaque technique.
Les 2 tanks vont jouer les 2 techniques.
Choc Galactique et Frappe de fléau stellaire infligent aussi un puissant DoT de 8 s aux joueurs ciblés.
Utilisez un CD défensif quand vous êtes ciblés par ces techniques.
Au lieu de lancer Choc galactique une 4ème fois, le boss remplit rapidement la plateforme d'anneaux de piques.
Les anneaux commencent sur les bords de la plateforme et convergent rapidement vers le centre, couvrant toute la plateforme et tuant le raid.
RESSOURCES
Pack complet de WAs pour le raid créé par Reloe (https://www.patreon.com/Reloe).
Il contient 2 groupes différents :
-Un pour les techniques où il faut assigner des joueurs spécifiques.
-Un pour tout ce qui est barres/icônes/textes pour traquer les techniques des boss.
La plupart des assignations sont faites automatiquement en Normal & Héroïque, pas besoin de notes.
L'add-on Northern Sky Raid Tools et la WeakAura sont REQUIS pour que tout fonctionne.
Add-on obligatoire pour faire fonctionner les WAs Northern Sky de Reloe (https://www.patreon.com/Reloe).
Tout le monde dans votre raid doit l'installer pour que les WAs Northern Sky fonctionnent.
Il vous permet aussi de partager facilement des WAs à votre groupe, de diviser votre raid en 2 d'un seul clic, etc.
WeakAura obligatoire pour faire fonctionner les WAs Northern Sky créé par Reloe (https://www.patreon.com/Reloe).
Déplacez les barres/icônes/textes des WAs des boss UNIQUEMENT via cette WA.
Mais vous pouvez changer l'échelle/taille/largeur/couleurs etc. de chaque WA librement.
Add-on qui ajoute plein de sons de synthèse vocale à votre jeu, créé par Causese.
Il vous permet d'ajouter des alertes sonores claires à votre Bossmod ou vos WeakAuras pour réagir mieux et plus vite.
